APIs power many of the digital experiences we use every day, from displaying weather information on a website to processing online payments and connecting different software applications. Among the most widely used approaches to building these connections is REST API integration. If you are new to web development, learning how to work with REST APIs can help you build more useful applications without creating every feature from scratch.
In this REST API tutorial for beginners, you will learn how to send HTTP requests, retrieve data from an API, understand JSON responses, and use the returned information in a simple application. You will also explore common HTTP methods, API endpoints, authentication basics, and practical ways to test requests using tools such as Postman. Each concept will be explained step by step, making it easier to follow even if you are just starting to explore APIs. With a basic understanding of web technologies and a willingness to experiment, you can make your first API request and see how applications exchange information. Along the way, you will learn how to recognize common errors, interpret response status codes, and handle data more reliably.
At Technology Moment, our goal is to make technology easier to understand through practical tutorials, helpful guides, and clear explanations. We focus on turning technical concepts into knowledge you can apply to real projects. By the end of this guide, you will have a foundation for working with REST APIs and the confidence to explore more advanced integrations. Let’s start with the basics and build your first API integration.
What Is a REST API and How Does It Work?
A REST API is a way for different software applications to communicate and exchange information over a network. REST stands for Representational State Transfer, an architectural style used to design web services. API stands for Application Programming Interface, which provides a defined way for one application to request data or functionality from another. For example, a weather application can retrieve temperature information from a weather service instead of collecting and storing weather data itself. This is one reason REST APIs are widely used in modern web and mobile application development.
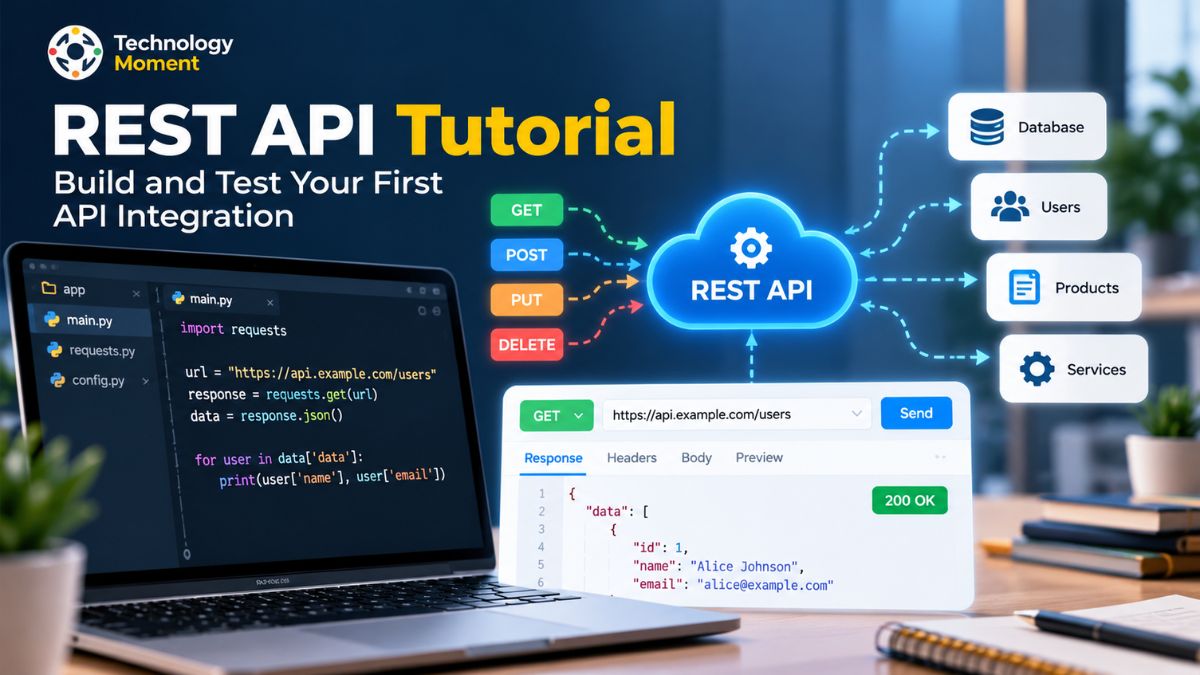
To understand how REST APIs work, imagine a client and a server communicating with each other. The client could be a web browser, a mobile application, or another software program. When the client needs information, it sends an HTTP request to a specific API endpoint. The server receives the request, processes it, and returns an HTTP response containing the result. Many REST APIs use JSON (JavaScript Object Notation) to represent the returned data because it is lightweight and easy for programming languages to process.
For example, an application might request information about a product from an online store. The server could return a JSON response containing the product name, price, and availability. The application can then display this information to the user. REST APIs commonly use HTTP methods such as GET to retrieve data, POST to submit data, PUT to replace a resource, PATCH to update selected fields, and DELETE to remove a resource. The method determines the intended action, while the endpoint identifies the resource involved.
In this REST API tutorial for beginners, you will learn how to send requests, inspect responses, and integrate API data into a small application. Understanding this request-and-response process is the first step toward building practical API integrations.
Prerequisites for This REST API Tutorial
Before starting this REST API tutorial, prepare a few basic tools and learn some fundamental concepts. You do not need advanced programming experience to make your first API request, but understanding how websites communicate with servers will make the process easier. Familiarity with HTML and JavaScript is useful if you want to display API data on a webpage. If you are new to programming, you can begin by testing requests with a graphical tool before writing any code.
HTTP is the protocol that allows clients and servers to exchange messages. A request contains information such as the HTTP method and endpoint URL, while the response includes a status code and may contain data. You should also become familiar with JSON, a common format for representing structured information. JSON uses objects, arrays, strings, numbers, Boolean values, and other supported data types to organize information in a readable format.
Next, choose a tool for making API requests. Postman is useful for sending HTTP requests, adding headers, providing parameters, and examining responses without writing a complete application. A modern web browser and a code editor will also help when you move from testing an API to integrating it into a project. You can explore the Postman Quick Start guide to learn the basic workflow.
Read its documentation to understand the available resources, request formats, authentication requirements, and usage limits. Some APIs work without an API key, while others require credentials. For your first exercise, choose a simple endpoint that returns sample JSON data. With these prerequisites ready, you can begin making HTTP requests and learning how REST API integration works in practice.
Understanding HTTP Requests and REST API Endpoints
HTTP requests are the foundation of most REST API interactions. Whenever an application needs information from a server or wants to submit data, it sends a request containing an HTTP method and a destination URL. The URL identifies the API endpoint, which represents a particular resource or operation. For example, an endpoint might provide a list of products, return details about one user, or accept information for creating a new record. Understanding API endpoints and HTTP methods helps you choose the correct request for your task.
The most common HTTP methods are GET, POST, PUT, PATCH, and DELETE. GET requests retrieve information, while POST requests commonly submit data to create a resource or trigger an operation. PUT is generally used to replace a resource, PATCH updates selected parts of a resource, and DELETE requests its removal. The exact behavior depends on the API’s design and documentation, so always check which methods an endpoint supports. These methods are central to REST API basics and everyday API development.
Headers provide additional information, such as the expected response format or authentication credentials. Query parameters allow you to filter, search, or paginate results. For example, an API might accept a query parameter that limits the number of products returned. A request body is commonly used with POST, PUT, and PATCH to send structured data, often in JSON format.
A 200 OK response generally indicates success, while 201 Created commonly indicates that a resource was created. Codes such as 400 Bad Request, 401 Unauthorized, and 404 Not Found help identify problems. Learning these HTTP methods, headers, endpoints, and status codes makes API testing and troubleshooting much easier. https://developer.mozilla.org/en-US/docs/Web/HTTP/Reference/Methods
How to Make Your First REST API Request
Making your first REST API request is easier when you begin with a simple public endpoint. For this example, use the JSONPlaceholder service, which provides sample data for learning and testing. Open Postman or another HTTP client, create a new request, select the GET method, and enter the following endpoint: https://jsonplaceholder.typicode.com/posts/1. This URL requests a sample post with the identifier 1. Because this example uses a public testing service, you can practice the basic request-and-response workflow without setting up your own server.
Click Send to submit the request. If the endpoint is available and the request succeeds, the server should return a response containing JSON data. The response may include fields such as userId, id, title, and body. These fields describe the sample post and demonstrate how an API organizes information. A 200 OK status normally means the request succeeded, while the response body contains the requested information. Postman lets you inspect the response body, headers, status code, and response time in one interface. https://learning.postman.com/docs/use/send-requests/requests/
In a JavaScript environment, try the following code:
fetch("https://jsonplaceholder.typicode.com/posts/1")
  .then(response => {
    if (!response.ok) {
      throw new Error(`HTTP error: ${response.status}`);
    }
    return response.json();
  })
  .then(data => {
    console.log(data);
  })
  .catch(error => {
    console.error("API request failed:", error);
  });
This code sends an HTTP request, checks whether the response indicates success, converts the response body into a JavaScript object, and prints the result. The error handler helps identify network problems or unsuccessful HTTP responses. You have now completed a basic REST API request and learned how to retrieve and inspect JSON data. The next step is to use the returned information inside a small application.
How to Read and Use JSON Responses
JSON, which stands for JavaScript Object Notation, is a lightweight data format used to exchange information between applications. Learning how to read JSON responses is an essential skill for anyone following a REST API tutorial for beginners. JSON organizes information into objects and arrays, making it easier to retrieve specific values and use them in a website or application.
For example, a product API might return an object containing a product name, price, and availability. An object uses key-value pairs, while an array stores an ordered collection of values. After receiving a JSON response, you can access individual fields by using their keys. This allows an application to display only the information users need instead of showing the complete response.
The following example retrieves a sample post from JSONPlaceholder:
async function getPost() {
  try {
    const response = await fetch(
      "https://jsonplaceholder.typicode.com/posts/1"
    );

    if (!response.ok) {
      throw new Error(`HTTP error: ${response.status}`);
    }

    const data = await response.json();

    console.log(data.title);
    console.log(data.body);
  } catch (error) {
    console.error("Unable to retrieve data:", error);
  }
}

getPost();
Here, response.json() converts the response body into a JavaScript value that your application can use. The code checks the HTTP status before processing the data and catches errors that may occur during the request.
You should also check whether expected fields exist before using them. An API might return an empty array, missing values, or an unexpected response format. Understanding JSON parsing, response validation, and error handling helps you build more reliable applications using third-party APIs.
How to Build a Small Application Using a REST API
One practical way to understand REST API integration is to build a small application that retrieves information from a public API and displays it on a webpage. It will request sample data from JSONPlaceholder and display the post title and description. This exercise demonstrates how to fetch data from an API and display it in a web application without building your own backend server.
Start by creating a file named index.html in your code editor. Add the following basic structure, which includes a button for loading the data and a container for displaying the result.
<!DOCTYPE html>
<html lang="en">
<head>
  <meta charset="UTF-8">
  <meta name="viewport" content="width=device-width, initial-scale=1.0">
  <title>REST API Demo</title>
</head>
<body>
  <h1>REST API Post Viewer</h1>
  <button id="loadPost">Load Post</button>
  <p id="status"></p>
  <article id="post"></article>

  <script>
    const button = document.getElementById("loadPost");
    const status = document.getElementById("status");
    const post = document.getElementById("post");

    button.addEventListener("click", async () => {
      status.textContent = "Loading...";
      post.replaceChildren();

      try {
        const response = await fetch(
          "https://jsonplaceholder.typicode.com/posts/1"
        );

        if (!response.ok) {
          throw new Error(`HTTP error: ${response.status}`);
        }

        const data = await response.json();
        const heading = document.createElement("h2");
        const paragraph = document.createElement("p");

        heading.textContent = data.title;
        paragraph.textContent = data.body;

        post.append(heading, paragraph);
        status.textContent = "Post loaded successfully.";
      } catch (error) {
        status.textContent = "Unable to load the post. Please try again.";
        console.error(error);
      }
    });
  </script>
</body>
</html>
Save the file and open it through a local development server. Click Load Post to send a GET request and display the returned data. The example uses textContent rather than inserting untrusted API content as HTML, which helps prevent HTML injection. If the request fails, the page displays an error message instead of silently remaining empty.
This small project demonstrates the complete API integration process: sending an HTTP request, receiving a JSON response, extracting data, and updating the user interface. You can extend it by adding a search field, loading multiple posts, or connecting another public API.
REST API Authentication Basics
Some REST APIs allow public access, while others require authentication to verify the identity of the application or user making a request. Authentication is an important part of API integration because it helps protect private information and restrict access to authorized clients. When working with an API, always read its documentation to determine whether credentials are required and which authentication method it supports.
One common approach is API key authentication. An API provider issues a key that identifies a client or grants access under specific conditions. Depending on the provider, the key may be supplied through a request header or another documented mechanism. The exact header name and required permissions vary between APIs, so do not assume that every service uses the same format.
Another widely used method is bearer token authentication. A client sends an access token in the HTTP Authorization header, typically using the Bearer scheme. A JavaScript request might look like this:
const response = await fetch(
  "https://api.example.com/profile",
  {
    headers: {
      Authorization: `Bearer ${accessToken}`,
      Accept: "application/json"
    }
  }
);
This is a generic example, not a working request to a real service. The URL and accessToken must be replaced with the values provided by your API provider. The token must also be obtained through the provider’s approved authentication process.
Keep API credentials secure. Never publish private keys or long-lived access tokens in a public repository or expose server-side secrets in browser JavaScript. For production applications, sensitive credentials should generally be stored on a trusted backend. Use HTTPS to protect data in transit, request only the permissions your application needs, and follow the provider’s token-expiration and renewal rules.
A Practical Walkthrough for Validating REST API Endpoints Using Postman
Postman is an API client that allows you to send HTTP requests, inspect responses, and troubleshoot REST API integrations without building a complete application first. It is especially useful for beginners because you can test API endpoints through a graphical interface. Before writing application code, you can use Postman to confirm that an endpoint works, understand its response structure, and identify any authentication or request-format requirements.
To test your first REST API, open Postman and create a new HTTP request. Select the GET method and enter https://jsonplaceholder.typicode.com/posts/1 in the URL field. Click Send to submit the request. If the request succeeds, Postman displays the response body along with information such as the HTTP status code, response headers, and response time. The JSON body should contain fields including userId, id, title, and body.
Next, experiment with query parameters and request headers. Query parameters can be added through Postman’s Params section, while headers can be configured in the Headers section. For example, you could test https://jsonplaceholder.typicode.com/posts?userId=1 to retrieve posts associated with a particular user in the sample dataset. Compare the response with the original request to understand how API parameters affect returned data.
You can also test POST requests. Select POST, enter https://jsonplaceholder.typicode.com/posts, and open the Body section. Choose raw JSON and provide a sample request body:
{
  "title": "My API Test",
  "body": "Testing a REST API request",
  "userId": 1
}
Click Send and inspect the status code and response body. JSONPlaceholder simulates creating a post, so the response does not represent a permanently saved record. Other APIs may create actual resources, so check their documentation before sending requests that change data.
For reliable API testing, verify the expected status code, response format, and important fields. Test unsuccessful requests when appropriate, and review error messages to understand failures. Postman also supports reusable collections and automated response tests. These features make it easier to repeat API tests and identify problems before integrating an endpoint into an application. For additional guidance, see the official Postman request documentation and response structure guide.
Common REST API Errors and How to Fix Them
When working with a REST API, you may encounter errors caused by incorrect requests, authentication problems, unavailable resources, or server issues. Understanding common REST API errors and how to fix them helps you troubleshoot problems faster and build more reliable applications. The first step is to check the HTTP status code, inspect the response body, and compare your request with the API documentation.
A 400 Bad Request error usually means the server cannot process your request because the supplied information is invalid or incorrectly formatted. Check the endpoint URL, query parameters, request headers, and JSON request body. Make sure required fields are present, and values use the expected data types. For example, an API expecting a number may reject a value supplied in an unsupported format.
A 401 Unauthorized response generally indicates that authentication is missing, invalid, or expired. Verify your API key or bearer token and confirm that the credentials are sent in the correct header. A 403 Forbidden response means the server refuses access to the requested resource, often because the authenticated client lacks the necessary permissions. A 404 Not Found error usually indicates an incorrect endpoint or a resource that does not exist. Check the URL and resource identifier before retrying.
A 429 Too Many Requests response means you have exceeded the API’s permitted request rate. Review the provider’s rate limits and, where available, follow the Retry-After header before sending another request. A 500 Internal Server Error indicates a server-side problem. You may need to wait, check the provider’s status page, or contact its support team if the issue continues.
During API testing, use Postman to inspect response codes, headers, and error messages. In JavaScript, handle failed requests gracefully and show understandable messages instead of leaving the interface blank. Avoid retrying every error immediately, especially when a request could create or modify data. For additional guidance, see MDN’s HTTP status code reference.
REST API Integration Best Practices
Following REST API integration best practices helps you create applications that are secure, maintainable, and dependable. Start by reading the API documentation before writing code. Documentation explains available endpoints, supported HTTP methods, required parameters, authentication requirements, response formats, and usage restrictions. Understanding these details reduces avoidable errors and helps you choose the correct way to retrieve or submit data.
Always use the appropriate HTTP method for the operation. PUT and PATCH are used for replacing or partially updating resources, respectively, and DELETE requests removal. Follow the specific API’s documented behavior rather than assuming every endpoint works identically. Check response status codes and validate the returned JSON before using it in your application.
Security should be a priority throughout the integration process. Use HTTPS to protect information transmitted between clients and servers. For browser-based applications, remember that JavaScript running on a user’s device cannot keep embedded secrets confidential. When an API requires a private credential, use a trusted backend to store the secret and communicate with the service. Apply authentication and authorization according to the provider’s requirements, and request only the permissions your application needs.
You should also implement error handling, input validation, and sensible request limits. If an API enforces rate limits, respect its instructions and retry temporary failures carefully. For operations that modify data, consider whether repeated requests could create duplicate records. Finally, keep your code organized and your documentation up to date. Test successful requests as well as invalid inputs, missing credentials, unavailable resources, and unexpected responses. Monitor failures during development and production so you can identify recurring problems. Consistent request handling, secure credential management, and thorough testing make REST API integrations easier to maintain as your application grows.
Frequently Asked Questions About REST APIs
How REST APIs Work: A Beginner-Friendly Guide
A REST API acts as a communication bridge between different software systems, allowing them to exchange information through HTTP requests. When an application needs specific information or wants to perform an action, it sends a request to a designated URL. The server processes that request and sends back a response, which may include a status code and structured data such as JSON. Methods like GET and POST help specify what the client wants to do. This approach makes it easier to integrate web platforms, mobile apps, and external services without building every feature from scratch.
How do I test a REST API without coding?
You can test a REST API using Postman, a graphical API client that lets you send HTTP requests without writing application code. Enter an endpoint URL, select an HTTP method, and click Send. You can then inspect the response body, status code, and headers. Always consult the API documentation and use a testing service or authorized environment when experimenting with requests that modify data.
What is the difference between GET and POST?
A GET request often places filtering values in query parameters, whereas a POST request may send information in a JSON request body. Their behavior depends on the endpoint’s design, so check the documentation before using either method. Never assume that sending a POST request automatically means data will be stored permanently.
How do I authenticate a REST API request?
Authentication depends on the API provider. Some services require an API key, while others use bearer access tokens or OAuth 2.0. Credentials are commonly sent through HTTP headers, following the provider’s instructions. Use HTTPS, protect private credentials, and never publish secret keys in frontend code or public repositories. If a request returns, verify that the credential is valid, correctly formatted, and has not expired.
Why REST API Requests Fail: Errors, Causes, and Solutions
Common REST API errors include 400 Bad Request, 401 Unauthorized, 403 Forbidden, 404 Not Found, 429 Too Many Requests, and 500 Internal Server Error. These codes indicate different problems, ranging from invalid request data to missing permissions, rate limits, and server failures. To troubleshoot them, inspect the response, verify the endpoint and credentials, check the documentation, and retry only when appropriate.
Is Postman useful for beginners learning REST APIs?
Absolutely. Beginners can use Postman to explore how APIs communicate before writing any application code. It allows them to send different types of requests, such as GET and POST, customize headers, pass URL parameters, and submit data in JSON format. The returned results help users examine HTTP status codes, verify authentication requirements, and identify how an API handles invalid requests. After testing an endpoint, developers can apply what they have learned to implement the same API interaction in JavaScript, Python, or another programming language.
REST vs SOAP: How Do These API Approaches Differ?
REST is an architectural style for designing networked APIs, commonly using HTTP methods and JSON responses. SOAP is a messaging protocol with a structured envelope and formal specifications, often using XML. REST APIs are frequently chosen for lightweight web and mobile integrations, while SOAP remains useful in systems that depend on its established standards and tooling. The best option depends on the application’s requirements, existing infrastructure, security needs, and compatibility constraints.