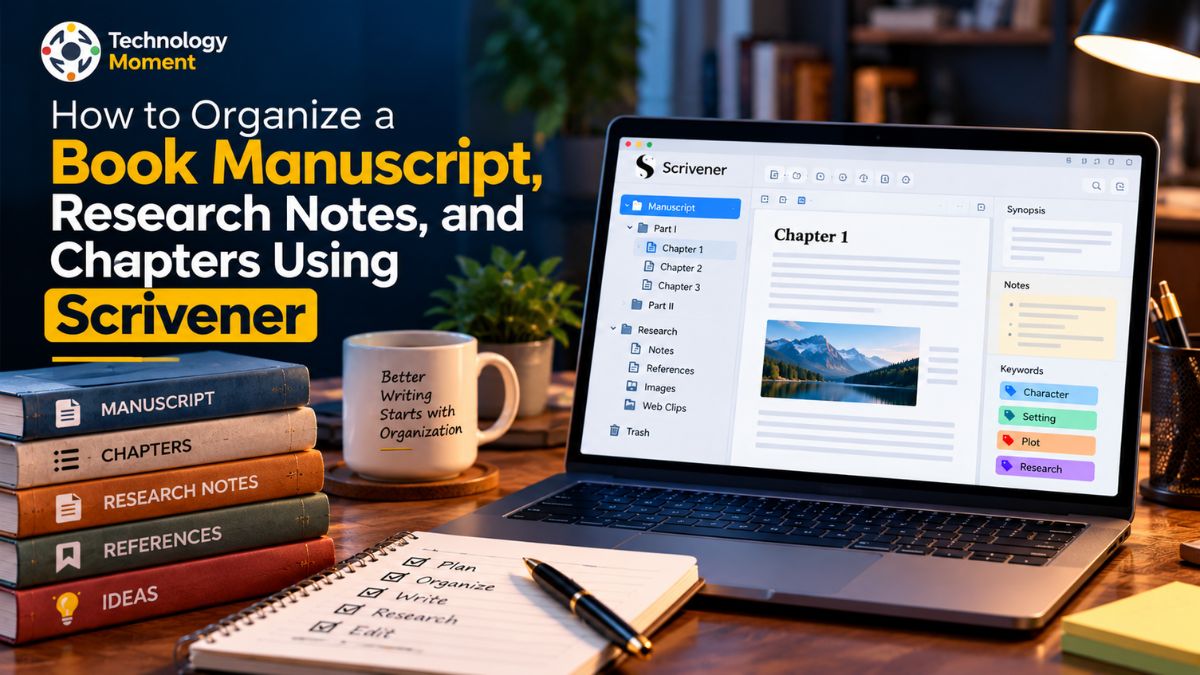
Writing a book involves more than putting words on a page. As a manuscript grows, authors often find themselves managing multiple chapters, research notes, outlines, reference materials, and unfinished ideas at the same time. Without a clear system, important information can become difficult to find, chapter structures can become confusing, and the writing process may lose its direction. This is where a well-organized writing environment can make a real difference.
Scrivener is a book writing software designed to help authors manage long-form writing projects in one workspace. Instead of working with a single lengthy document, writers can divide their manuscripts into smaller sections, organize chapters and scenes, and keep supporting research materials within the same project. Its Binder provides a central place for arranging documents, while the Corkboard and Outliner help writers plan, review, and restructure their work. Authors can also use the Research folder to keep useful notes and reference materials separate from their manuscript.
However, having access to these features is only part of the solution. Knowing how to use them together creates a more practical and consistent writing process. In this guide, Technology Moment explores a step-by-step Scrivener book writing workflow, covering manuscript organization, chapter planning, research management, outlining, and overall book structure. Whether you are writing your first novel, developing a nonfiction book, or managing a research-based manuscript, you will learn how to bring your writing materials together and build an organized workflow that supports your creative process.
What Is Scrivener and How Does It Help Organize a Book?
Scrivener is a long-form writing application designed for authors who need more than a basic word processor to develop and manage their writing projects. Unlike traditional writing software, which generally presents a manuscript as one continuous document, Scrivener allows writers to divide their work into smaller sections and manage them within a single project. This approach makes it particularly useful for novelists, nonfiction authors, researchers, and anyone working on a lengthy manuscript.
Instead of switching between multiple documents, writers can keep their chapters, notes, research materials, and supporting information organized in one workspace. One of the main advantages of Scrivener for book writing is its flexible project organization. Authors can create separate folders for chapters, individual documents for scenes, and dedicated spaces for background research. Its Binder provides an overview of the entire project, while the Corkboard and Outliner offer different ways to plan and review the manuscript structure.
Writers can also rearrange sections as their ideas develop without having to rewrite the entire document. This flexibility is helpful when a story changes direction or a nonfiction book requires a different chapter sequence. Scrivener also supports a more organized writing workflow by separating the planning, research, and drafting stages. Authors can develop their outlines, collect reference materials, write individual sections, and review their progress within the same project.
Although it does not replace the creative decisions involved in writing, it provides a structured environment that makes complex projects easier to manage. For writers looking to improve their Scrivener book writing workflow, understanding these organizational features is a practical starting point.
Understand the Scrivener Binder and Its Project Structure
The Scrivener Binder is the central navigation area of a writing project. Located in the project window’s sidebar, it displays the different folders and documents that contain a book’s manuscript, research materials, and supporting notes. Think of it as a digital filing system that allows authors to see how their writing is arranged without opening every document individually.
Understanding the Binder is an important step in creating an organized Scrivener project structure, especially when working with several chapters, scenes, and reference files. Depending on the selected project template, the Draft folder may also be called Manuscript. It is designed to hold the text intended for the final book, including individual chapters, sections, and scenes.
The Research folder provides a separate location for supporting materials, such as notes, reference documents, and other useful resources. The Trash folder holds items removed from the active project structure until they are permanently deleted. Keeping these areas distinct helps writers maintain a clear separation between manuscript content and background information.
Authors can customize their Binder by creating additional folders, subfolders, and documents according to their writing needs. For example, a nonfiction writer might create separate folders for each major book section, while a novelist could organize chapters into individual scene documents. Documents and folders can also be rearranged using drag-and-drop organization, making it easier to update the manuscript as the project develops. A consistent naming system further improves navigation and reduces confusion. Rather than creating unnecessary folders, writers should choose a structure that reflects the actual organization of their book. This simple approach makes Scrivener manuscript organization more manageable throughout the writing process.
How to Organize Book Chapters and Scenes in Scrivener
Organizing chapters and scenes is an essential part of managing a long manuscript. When a book contains dozens of sections, keeping everything inside one large document can make revisions and navigation difficult. Scrivener chapter organization offers a more flexible approach by allowing authors to divide their manuscripts into individual folders and documents. Instead of treating a book as one continuous piece of text, writers can work on smaller sections while maintaining an overview of the complete manuscript.
A practical way to organize a book in Scrivener is to create a separate folder for each major chapter. Individual scenes or subsections can then be added as documents within the relevant chapter folder. For example, a novel with ten chapters might have ten chapter folders, each containing several scene documents. A nonfiction manuscript could follow a similar arrangement, using individual documents for topics, arguments, examples, or supporting explanations. This structure makes it easier to locate specific content and work on one section without navigating through the entire book.
Scrivener also makes it possible to rearrange chapters and scenes as the manuscript develops. Writers can move documents and folders within the Binder using drag-and-drop organization, allowing them to experiment with different sequences. This is particularly useful when a chapter needs to move earlier in the book or when two scenes work better in a different order.
The Corkboard can provide a visual overview of individual sections, while the Outliner helps writers review their structure in a more detailed list. For a consistent writing workflow, authors should give each document a meaningful title and maintain a logical chapter hierarchy. These habits make manuscript structure easier to understand, review, and revise as the book grows.
How to Manage Research Notes and Reference Materials in Scrivener
Research is an important part of writing both fiction and nonfiction books. Authors may need to collect background information, reference documents, important facts, character details, interview notes, and other supporting materials before and during the writing process. When these resources are scattered across different folders, applications, or devices, finding the right information can become time-consuming. Scrivener research management provides a convenient way to keep relevant materials together within the same writing project, making them easier to access while drafting and revising a manuscript.
The dedicated Research folder in Scrivener is designed to store information related to a book without mixing it with the main manuscript. Writers can use it to organize supporting documents, PDFs, images, and other reference materials. Creating separate subfolders for different research topics can make the collection easier to navigate. For example, an author writing a historical novel might create folders for historical events, locations, characters, and cultural references.
A nonfiction writer could organize research by chapter, subject, interview, or source. This arrangement helps maintain a clear connection between research materials and the sections they support. Authors can also create individual documents for writing notes, summaries, ideas, and important observations. Giving these documents descriptive titles makes it easier to identify their contents later. Another useful practice is to keep research notes separate from finished manuscript text so that background information does not accidentally become part of the final draft.
Writers can open relevant research materials while working on their manuscript, helping them check details without repeatedly searching through unrelated files. A well-maintained research folder can therefore improve the overall writing process and reduce unnecessary interruptions. By combining organized reference materials with a clear manuscript structure, authors can build a more reliable Scrivener book writing workflow and keep their research accessible throughout the life of the project.
How to Create a Book Outline Using Scrivener Corkboard and Outliner
Creating a clear outline before writing can help authors understand how their book will develop from beginning to end. However, planning a manuscript does not always mean following a fixed structure. Ideas change, chapters move, and new sections often emerge during the writing process. Scrivener makes this process more flexible through two useful outlining tools: the Corkboard and the Outliner. Both features help writers visualize their manuscript structure, organize chapters, and manage individual sections without relying on a single lengthy document.
The Scrivener Corkboard is a visual planning space where documents appear as virtual index cards. Writers can add a title and synopsis to describe what that section will contain. For example, a novelist might create cards for the opening scene, character introduction, main conflict, turning point, and conclusion. A nonfiction author could use cards to represent chapter topics, key arguments, and supporting examples. Moving cards into a different order can help writers experiment with the sequence of their ideas and, in the standard ordered Corkboard view, rearrange the corresponding manuscript sections. This makes it useful for developing a scene-by-scene outline or reviewing the overall flow of a book.
The Scrivener Outliner provides a more detailed view of the same project structure. Instead of focusing mainly on visual cards, it displays documents in a structured list with information such as titles, synopses, word counts, status, and other available metadata. Writers can customize the visible columns to focus on the information most relevant to their project. This is particularly helpful when managing a large manuscript with multiple chapters and sections.
Although both tools support book outlining, they serve slightly different purposes. The Corkboard is useful for visual brainstorming and rearranging ideas, while the Outliner is better suited to reviewing detailed project information and tracking progress. Authors do not need to choose only one. Using both together can create a practical outlining process: begin with visual planning, then review the chapter hierarchy and writing progress in the Outliner. This approach helps keep a book organized while leaving room for creative changes.
How to Build an Effective Scrivener Book Writing Workflow
An effective writing workflow helps authors move from an initial idea to a completed manuscript without losing track of important information. When working on a long book, the process often involves several activities, including planning chapters, collecting research, drafting sections, reviewing content, and making revisions. Managing these activities without a consistent system can create unnecessary confusion. A well-planned Scrivener book writing workflow brings these tasks together and gives writers a practical way to manage their projects from start to finish.
The first step is to establish a clear structure for the book. Before drafting large sections, decide on the main topics, chapters, and supporting sections. Create an appropriate folder hierarchy in the Scrivener Binder so that each part of the manuscript has a logical place. For example, a writer developing a business book might organize the project into an introduction, several main chapters, case studies, and a conclusion. Individual documents can then be created for smaller sections that require separate drafting or revision. This approach makes manuscript planning easier and allows authors to work on different parts without constantly navigating a long document.
The next step is to organize research and writing materials. Use the Research folder to store reference documents, background notes, and supporting information. Keep these materials separate from the main manuscript so that the writing area remains focused. When beginning a chapter, review the relevant research and outline its main points using the Corkboard or Outliner. This creates a useful connection between research management and the actual drafting process.
Once writing begins, work on manageable sections instead of trying to complete the entire book at once. Set realistic writing targets, review document status, and update chapter synopses as the manuscript develops. Scrivener’s project and document targets can help writers monitor word-count progress, while Snapshots can preserve earlier versions before substantial revisions. Regularly reviewing the Binder also helps identify missing sections and unnecessary documents.
Finally, build time into the workflow for editing and organizing the completed material. Check chapter order, improve transitions, and ensure that research supports the relevant sections. An effective writing workflow should remain flexible rather than becoming a rigid set of rules. By combining planning, research management, drafting, and revision in one organized system, authors can make long-form writing more manageable and maintain better control over their book projects.
How to Organize Different Types of Books in Scrivener
Not every book follows the same structure, so an effective organization system should reflect the type of manuscript being written. A novel, a nonfiction guide, and an academic book may all contain chapters and supporting notes, but their planning requirements are different. Scrivener offers a flexible project structure that allows authors to arrange folders, documents, and reference materials according to their specific writing needs. Choosing an appropriate organization method at the beginning can make the entire writing process easier to manage.
For fiction writers, Scrivener can be used to organize novels around chapters, scenes, characters, locations, and storylines. A novelist might create separate chapter folders containing individual scene documents, while keeping character profiles and location descriptions in the Research folder. The Corkboard can help visualize the sequence of events, and the Outliner can provide a broader view of chapter titles, synopses, and writing progress. This type of novel manuscript organization is particularly useful when a story contains multiple characters, parallel storylines, or frequent changes in scene order.
Nonfiction authors generally need a different structure. Instead of focusing on scenes and character development, they may organize their projects around major subjects, arguments, examples, and supporting evidence. For instance, someone writing a digital marketing book could create chapters covering search engine optimization, content marketing, social media, and analytics. Each chapter could contain smaller documents for explanations, case studies, and practical examples. Research notes and reference materials can remain in separate folders until the relevant information is needed during drafting. This makes Scrivener for nonfiction writers a useful option for managing information-heavy projects.
Academic and research-based manuscripts may require an even more detailed structure. Students, researchers, and professional writers can organize literature reviews, methodology, findings, discussion sections, and references as separate parts of a larger project. Individual documents can hold research summaries, interview notes, and supporting information. Writers should also plan how citations, footnotes, and bibliographies will be handled when preparing the final document.
The best approach is to choose a structure that matches the book rather than forcing every project into the same template. Fiction writers may prioritize scenes and story progression, while nonfiction and academic authors may focus more on topics, evidence, and references. By adapting the Binder, Corkboard, Outliner, and Research folder to the manuscript’s needs, authors can create an organized writing environment that supports different types of books.
Common Scrivener Organization Mistakes Writers Should Avoid
Scrivener offers several features for managing book manuscripts, research materials, chapters, and writing notes. However, having access to these tools does not automatically create an organized writing project. Many beginners make small organizational mistakes that gradually make their manuscripts harder to manage. Understanding these problems early can help authors develop a more effective Scrivener writing workflow and avoid unnecessary complications during drafting and editing.
One common mistake is creating too many folders and subfolders. Although Scrivener allows writers to build a flexible project structure, adding separate folders for every small idea can make navigation confusing. A better approach is to create a simple hierarchy that reflects the actual structure of the book. Organize major sections into chapters and use individual documents for scenes, topics, or smaller sections. This keeps the Binder easy to navigate without sacrificing flexibility.
Another mistake is mixing research materials with the main manuscript. Reference documents, images, background notes, and supporting information should generally remain separate from the text intended for the final book. Scrivener provides a dedicated Research folder for this purpose. Keeping research and manuscript content organized separately makes it easier to review the draft and reduces the possibility of accidentally including reference materials in the exported manuscript.
Some writers also begin drafting without creating even a basic chapter outline. This can result in repeated ideas, poorly arranged sections, and an unclear manuscript structure. Using the Corkboard and Outliner to plan chapter topics and scene sequences can provide a useful overview before writing begins. Another problem is using inconsistent document names. Titles such as “New Document,” “Chapter Draft 2,” or “Final Version Updated” may become difficult to identify later. Descriptive names make searching and navigation easier.
Ignoring backups and revision management is another serious risk. Writers should regularly back up their complete Scrivener projects and consider using Snapshots before making major changes to individual documents. Finally, avoid treating the original project structure as permanent. Review it periodically and remove unnecessary items when appropriate. A simple, consistent organization system is usually more useful than an overly complicated one. By avoiding these common mistakes, authors can maintain better control over their writing projects and spend more time developing their books.
How to Prepare and Export an Organized Manuscript in Scrivener
Completing the first draft of a book is an important milestone, but preparing it for editing, sharing, or publication requires additional attention. Before exporting a manuscript, authors should review the chapter sequence, check the organization of individual sections, and make sure the document contains the intended content. Scrivener provides a feature called Compile that brings the selected manuscript sections together and prepares them for export into different file formats. Understanding this process helps writers move from an organized writing project to a document that can be shared with editors, publishers, or collaborators.
The first step is to review the complete manuscript structure in the Binder. Check that all chapters appear in the correct order and that individual documents are stored under the appropriate folders. Read through the sections to identify incomplete paragraphs, repeated information, missing transitions, and unnecessary content. Scrivener’s Scrivenings view can also help writers review multiple selected documents as a continuous piece of text without permanently merging their separate documents. This is useful for checking chapter flow and maintaining consistency across a long manuscript.
Before making substantial revisions, consider using Snapshots to preserve earlier versions of important text documents. This allows writers to compare previous and current versions when reviewing changes. It is also important to create a separate backup of the complete Scrivener project. Snapshots and project backups serve different purposes: Snapshots preserve selected document text, whereas project backups protect the wider project structure and its contents.
Once the manuscript is ready, use Scrivener’s Compile feature to prepare the document for export. Open the Compile interface and select an appropriate output format, depending on the intended use. Available formats can include Microsoft Word (.docx), PDF, RTF, plain text, and supported ebook formats. Writers can review section layouts, formatting, titles, page settings, and other available options before generating the final file. They should also check which folders and documents are selected for compilation because the intended manuscript content must be included while research notes and unrelated materials remain excluded.
After compilation, open the exported document and review its appearance separately from the Scrivener project. Check headings, spacing, page breaks, chapter titles, and overall readability. Remember that an exported manuscript is not automatically publication-ready. Different publishers and self-publishing platforms may require specific formatting standards. A careful final review helps ensure that the manuscript is organized, readable, and ready for its next stage.
Frequently Asked Questions About Scrivener Book Organization
What is Scrivener used for in book writing?
Scrivener is writing software designed to help authors manage long-form projects such as novels, nonfiction books, and research manuscripts. It allows writers to organize chapters, scenes, research notes, and supporting documents within one project. Features such as the Binder, Corkboard, and Outliner help users plan their manuscript structure, rearrange sections, and manage different stages of the writing process more efficiently.
How do you organize a book in Scrivener?
Start by creating a clear project structure using the Scrivener Binder. Keep the main manuscript inside the Draft or Manuscript folder, divide it into chapter folders, and create individual documents for scenes or smaller sections. Store supporting materials in the Research folder. You can then use the Corkboard and Outliner to review your chapter sequence, update your outline, and maintain an organized writing workflow.
How do you organize research notes in Scrivener?
Use the dedicated Research folder to collect background information, reference documents, PDFs, images, and supporting notes. Create separate subfolders for different subjects or chapters so that materials remain easy to locate. You can also create individual documents for research summaries and important observations. Keeping these resources separate from the main manuscript helps maintain a clean project structure while making relevant information accessible during writing.
What is the difference between Scrivener Binder and Outliner?
The Binder provides a hierarchical overview of the entire Scrivener project, including manuscript folders, documents, and research materials. The Outliner presents selected project contents in a structured list with additional information such as titles, synopses, word counts, and metadata. The Binder is useful for general navigation and organization, while the Outliner is particularly helpful for reviewing manuscript structure and managing detailed writing information.
Can you write an entire book in Scrivener?
Yes. Scrivener is designed to support long-form writing projects, including complete novels, nonfiction books, and academic manuscripts. Writers can develop individual chapters, organize scenes, collect research materials, and combine selected sections through the Compile feature. Its flexible structure makes it possible to manage a book from initial planning through drafting and revision. The finished manuscript can then be exported into a supported file format for further editing or publication.